How to Install Python 3 on Mac – Brew Install Update Tutorial
MacOS comes with Python pre-installed. But it's Python Version 2.7, which is now deprecated (abandoned by the Python developer community).
The entire Python community has now moved on to using Python 3.x (the current version as of writing this is 3.9). And Python 4.x will be out soon, but it will be completely backward compatible.
If you try to run Python from your MacOS terminal, you'll even see this warning:
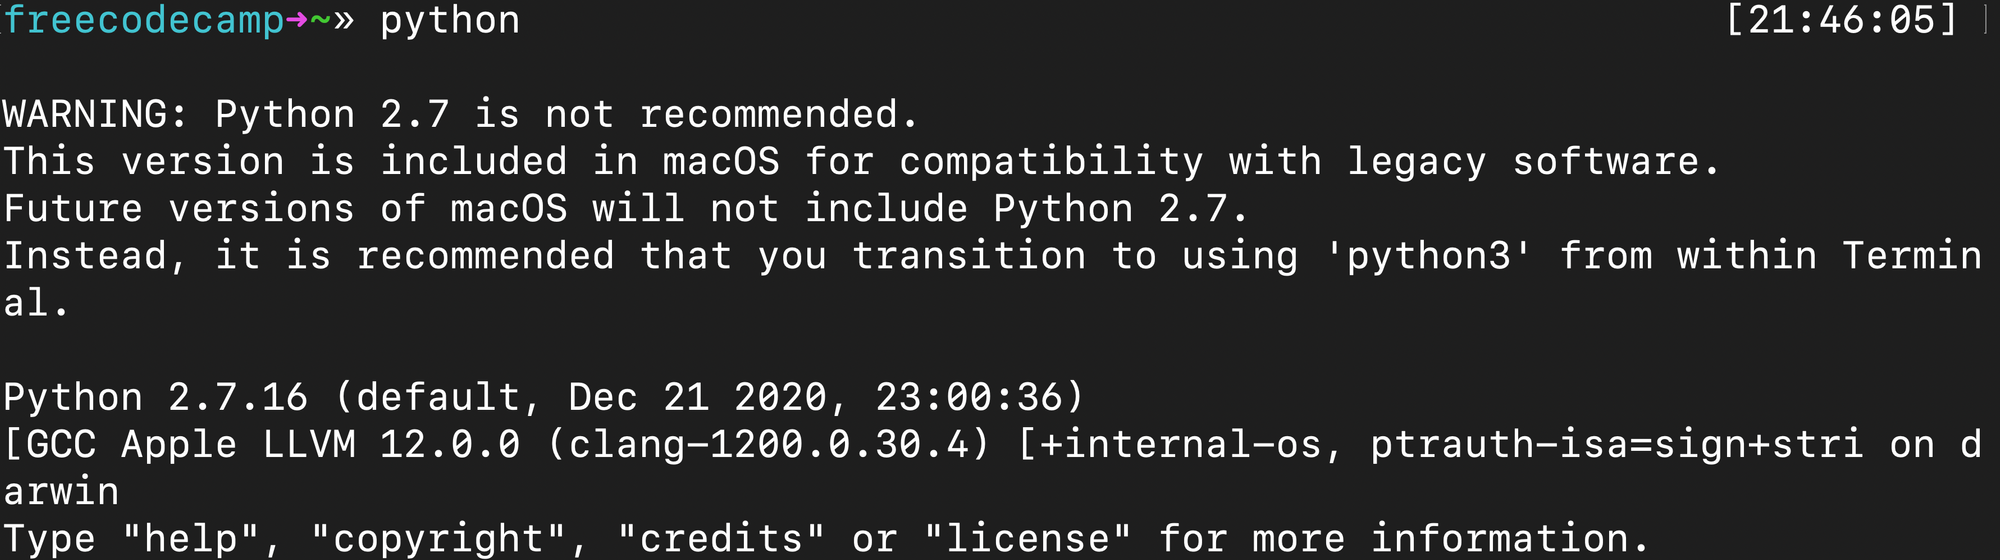
Until Apple decides to set Python 3.x, as the default you're going to have to install it yourself.
A Single Command to Run Python 3
For some of you reading this, this command may be enough. You can run Python 3 using this command (with the 3 at the end).
python3If that's all you came for, no worries. Have a fun day and happy coding.
But if you want a proper Python version control system to keep track of various versions – and have fine-grain control over which version you use – this tutorial will show you exactly how to accomplish this.

How to Install Homebrew on Mac
First you need to install Homebrew, a powerful package manager for Mac.
Open up your terminal. You can do this by using MacOS spotlight (command+space) and typing "terminal".
Now that you're in a command line, you can install the latest version of Homebrew by running this command:
/bin/bash -c "$(curl -fsSL https://raw.githubusercontent.com/Homebrew/install/HEAD/install.sh)"Your terminal will ask for Super User-level access. You will need to type your password to run this command. This is the same password you type when you log into your Mac. Type it and hit enter.

Homebrew will ask you to confirm you want to install the following. You have to press enter to continue. (Or press any other key if you get cold feet.)

How to Install pyenv to Manage Your Python Versions
Now let's take a moment to install PyEnv. This library will help you switch between different versions of Python (in case you need to run Python 2.x for some reason, and in anticipation of Python 4.0 coming).
Run this command:
brew install pyenv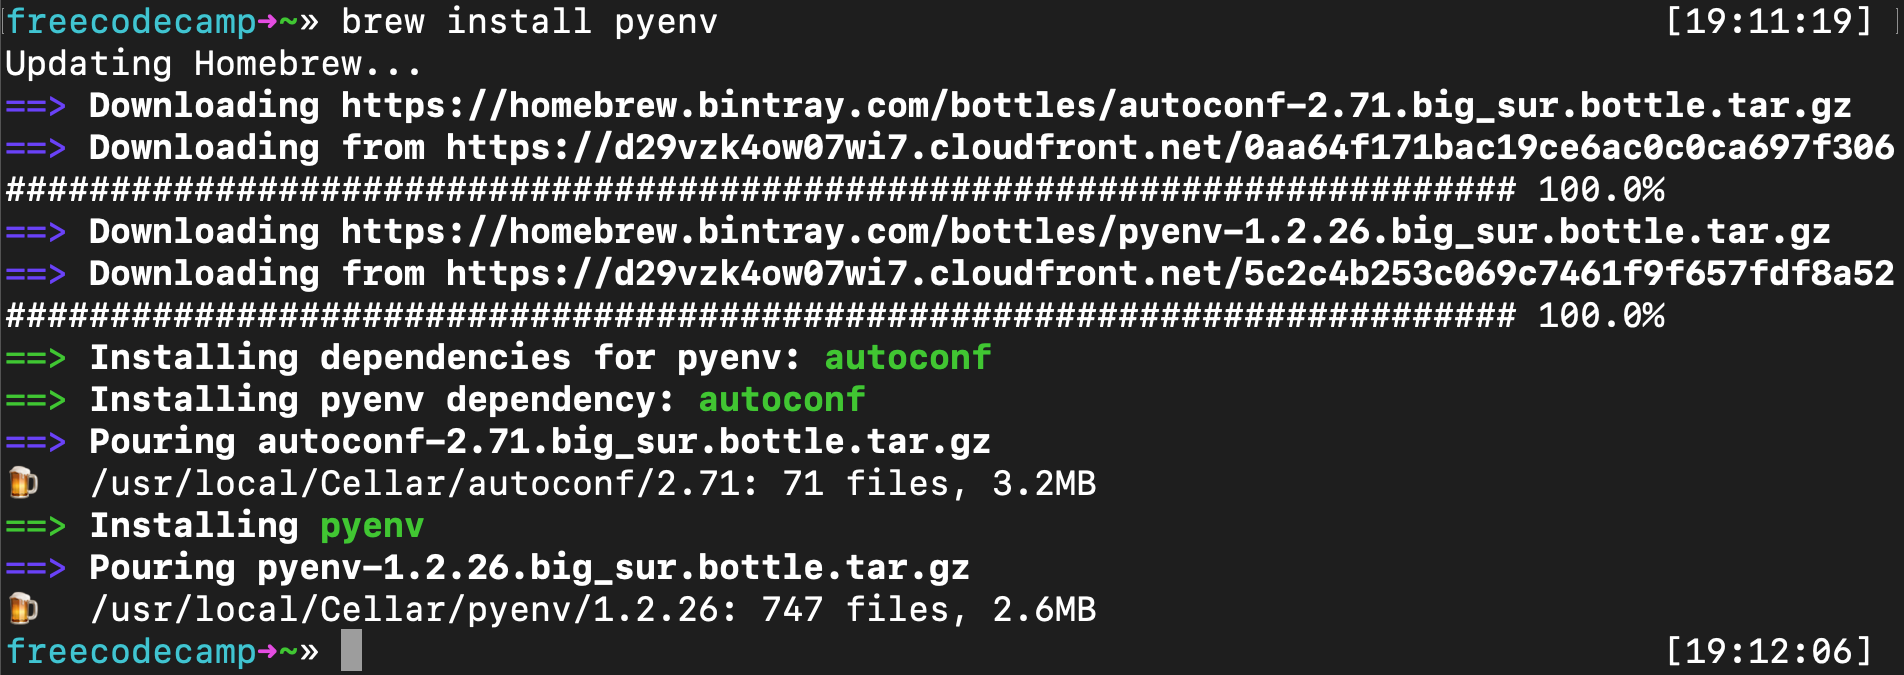
Now you can install the latest version of Python.
How to Use pyenv to Install Python or Update Your Python Version
Now you just need to run the following command:
pyenv install 3.9.2 Note that you can substitute 3.9.2 for whatever the latest version of Python is. For example, once Python 4.0.0 comes out, you can run this:
pyenv install 4.0.0Troubleshooting pyenv Installation
If you encounter an error that "C compiler cannot create executables" then the simplest way to solve this is to reinstall Apple's Xcode.
Xcode is a tool created by Apple that includes all the C libraries and other tools that Python uses when it runs on MacOS. Xcode is a whopping 11 gigabytes, but you'll want to be up-to-date. You may want to run this while you're sleeping.
You can get the latest version of Apple's Xcode here. I had to do this after upgrading to MacOS Big Sur, but once I did, all the following commands worked fine. Just re-run the above pyenv install 3.9.2 and it should now work.
How to Set Up Your MacOS PATH for pyenv (Bash or ZSH)
First you need to update your Unix path to pave a way for PyEnv to be able to interact with your system.
This is a long explanation of how PATH works in MacOS (and Unix), straight from the pyenv GitHub repo.
pythonpipPATH
/usr/local/bin:/usr/bin:/bin
PATH/usr/local/bin/usr/bin/bin
And here is their explanation of what a Shim is. I'm quoting them at length again because I really can't explain this better myself.
shims PATH$(pyenv root)/shims:/usr/local/bin:/usr/bin:/bin
rehashingpythonpip
Shims are lightweight executables that simply pass your command along to pyenv.
Here's how to update your .bash_profile in Bash (which is installed in MacOS by default):
echo 'export PYENV_ROOT="$HOME/.pyenv"' >> ~/.bash_profile
echo 'export PATH="$PYENV_ROOT/bin:$PATH"' >> ~/.bash_profile
Or if you've installed ZSH (or OhMyZSH) like I have, you'll want to edit the .zshrc file instead:
echo 'export PYENV_ROOT="$HOME/.pyenv"' >> ~/.zshrc
echo 'export PATH="$PYENV_ROOT/bin:$PATH"' >> ~/.zshrc
Then you want to add PyEnv Init to your terminal. Run this command if you're using Bash (again, this is the default with MacOS):
echo -e 'if command -v pyenv 1>/dev/null 2>&1; then\n eval "$(pyenv init -)"\nfi' >> ~/.bash_profile
Or run this command if you're using ZSH:
echo -e 'if command -v pyenv 1>/dev/null 2>&1; then\n eval "$(pyenv init -)"\nfi' >> ~/.zshrc
Now reset your terminal by running this command:
resetHow to Set a Version of Python to Global Default (Bash or ZSH)
You can set the latest version of Python to be global, meaning it will be the default version of Python MacOS uses when you run Python applications.
Run this command:
pyenv global 3.9.2Again, you can replace 3.9.2 with whatever the latest version is.
Now you can verify that this worked by checking the global version of Python:
pyenv versionsYou should see this output:

The Final Step: Close Your Terminal and Restart it
Once you've restarted your browser, you run the python command and you'll launch the new version of Python instead of the old one.

Congratulations. Thank you for reading this, and happy coding.